Introduction
DigitalOcean’s Elixir one-click installation provides a convenient way to get your Elixir application up and running on a Ubuntu server. This tutorial will give you all the details you need to get your project off the ground.
In addition to what comes with a plain Ubuntu 14.04 Droplet, the Elixir one-click image includes the following components:
- Elixir version 1.0.5: Elixir is a programming language that runs on the Erlang VM, and provides more extensibility on top of Erlang’s speed and dependability.
- Phoenix version 1.0: Phoenix is a MVC framework for Elixir that helps with the structure and usability of your app.
- PostgreSQL 9.4.4: PostgreSQL is a commonly used database server for production Elixir application deployments, and it stores your application’s data.
- NodeJS 4.1.1: NodeJS is a front-end JavaScript platform for when you need JavaScript’s flexibility in your application or site.
- Cowboy 1.0.3: Cowboy is a light-weight HTTP server built in Erlang that serves your application to users.
This tutorial will cover how to create an Elixir Droplet, how the components are configured, where the login names and passwords can be found, and how to launch your application.
Creating Your Elixir Droplet
We’ll guide you through the steps to creating your own Elixir Droplet.
First, log in to the DigitalOcean Control Panel, then click the Create Droplet button.
On the Droplet creation page, specify your desired hostname and size. For a basic application that won’t receive much traffic, a 1GB Droplet should be fine.

Select your desired region.

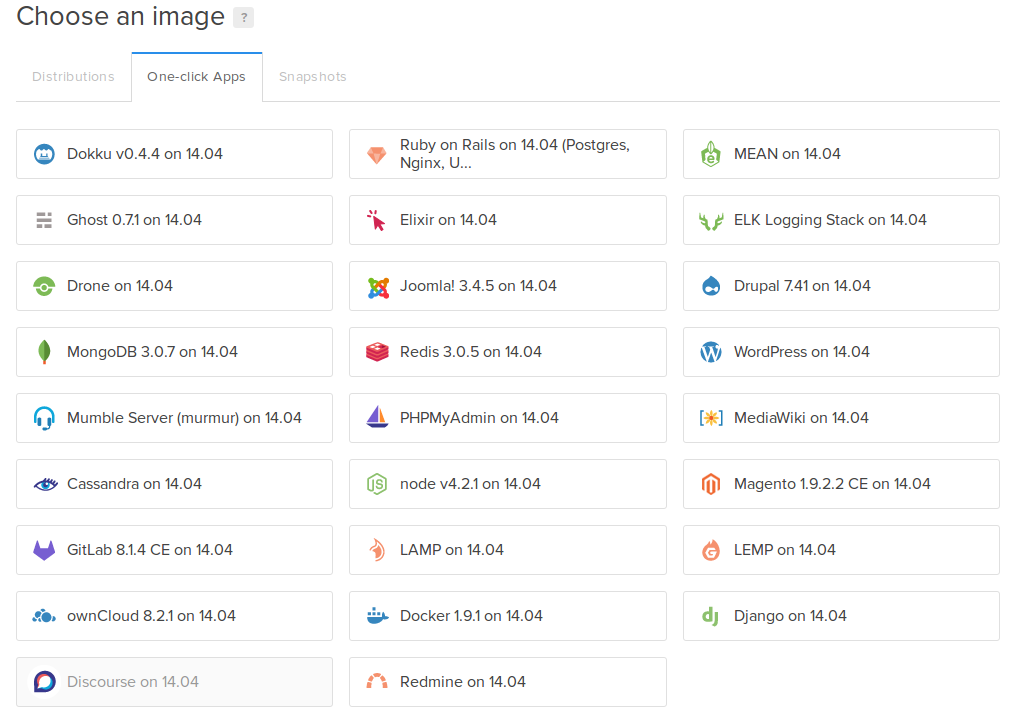
Now, in the Select Image section, click the Applications tab and select the Elixir on 14.04 image:

Next, select any additional settings, such as private networking, IPv6, or backups.
Finally, select which SSH keys, if any, you want to use for accessing this Droplet, and hit the Create Droplet button.
Your Elixir Droplet will be ready soon. For more details about creating Droplets, check out this tutorial: How To Create Your First DigitalOcean Droplet.
Starting and Accessing Your Elixir Application
The one-click application ships with a placeholder Elixir application. You can start it by running these commands to move into the application directory, and run Phoenix on the Cowboy web server in the background:
- cd test
- elixir --detached -S mix phoenix.server
If you’d prefer to run this application in the foreground, run this command instead:
- cd test
- mix phoenix.server
You can then open http://your_server_ip:4000 in a web browser to verify that Elixir is running.

If you see the sample Phoenix page, you’re ready to log into your server.
Accessing Your Elixir Instance Via a Web Browser
You can access your Elixir instance as a user of the application by visiting the Droplet’s IP address in a web browser. Your Droplet’s public IP address can be found in the DigitalOcean Control Panel.
Browse to http://your_server_ip in your browser of choice, or use a domain name if you have created a DNS record to connect your domain to your IP address.
Accessing Your Elixir Instance Via SSH
To deploy your own Elixir application, you will need to connect to your Droplet as root via SSH. On your computer, open a terminal and enter this command:
- ssh root@your_server_ip
If you are prompted for a password, enter the password that was emailed to you when the Droplet was created. Alternatively, if you set up the Droplet with SSH keys, the keys will be used for authentication instead.
If you haven’t used SSH or PuTTY before, you may want to refer to this tutorial for more details: How To Connect To Your Droplet with SSH.
Locating Login Names and Passwords
The Elixir one-click application comes preconfigured with the following:
- A system user named elixir
- A PostgreSQL database user also named elixir
The passwords for both of these logins are randomly generated, and can be found in the message of the day (MOTD) that will appear whenever you log into the server via SSH. The MOTD should look something like this:
-------------------------------------------------------------------------------------
Thank you for using DigitalOcean's Elixir Application.
We have created a default Elixir application that can be seen from http://111.111.11.111/
-------------------------------------------------------------------------------------
You can use the following SFTP credentials to upload your webpages (using FileZilla/WinSCP/Rsync):
  * Host: 111.111.11.111
  * User: elixir
  * Pass: PzAaUykNL4
-------------------------------------------------------------------------------------
You can use the following Postgres database credentials:
  * User: elixir
  * Pass: temq0AtHj7
-------------------------------------------------------------------------------------
## Cowboy information goes here?
You can also view the MOTD in the file /etc/motd.tail.
Uploading Files
We recommend that you use SFTP (Secure FTP), SCP, or Rsync to upload your files, as they all use encryption for transmission of data.
Windows users can upload files with WinSCP. For all other operating systems (including Windows) you can use FileZilla and Rsync.
For seasoned developers, we have an article on how to set up Git
Your SFTP credentials are provided in the MOTD, like the user passwords. These credentials are different and randomly generated for every Droplet.
Next Steps
- Follow our Initial Server Setup guide to give
sudoprivileges to your user, lock down root login, and take other steps to make your VPS ready for production.
Source: DigitalOcean News